
This post will teach you How to Dry Orange Slices in the Oven so you can easily turn them into a culinary accent or use them as seasonal décor. With a few simple steps and minimal equipment, you’ll have dried orange slices ready in a couple of hours.

This guide is a helpful reference for anyone wanting to dry orange slices in the oven. Dried orange slices are versatile — use them as ornaments on a Christmas tree, garnish cocktails, or tuck them into baked goods for a bright, decorative touch.
Try other kitchen projects on the blog for more ideas.
Table of Contents
- Why You’ll Love This Recipe
- Ingredients & Substitutions
- How to Make Dried Orange Slices in the Oven
- How To Use Dried Orange Slices
- Expert Tips
- Storage & Shelf Life
- Additions & Variations
- Recipe FAQs
- More Cooking Resources
- How to Dry Orange Slices in the Oven Recipe
Why You’ll Love This Recipe
- Simple – Just a few straightforward steps from fresh fruit to dried slices.
- Easy – Suitable for cooks of all skill levels.
- One ingredient – All you need is oranges (or other citrus).
- Beginner-friendly – Requires minimal tools and time to prepare.
Ingredients & Substitutions

- Oranges: Use any variety you prefer (navel, valencia, blood oranges). You can also dehydrate lemons or limes; they will dry faster since they are smaller.
Full ingredient list and measurements are on the recipe card below.
How to Make Dried Orange Slices in the Oven
Quick Overview
- Preheat the oven to a low temperature.
- Slice the oranges thinly and pat dry.
- Bake slowly until fully dehydrated.
Step by Step Instructions
Avoid slicing oranges too thick; thinner slices dry more evenly and faster.
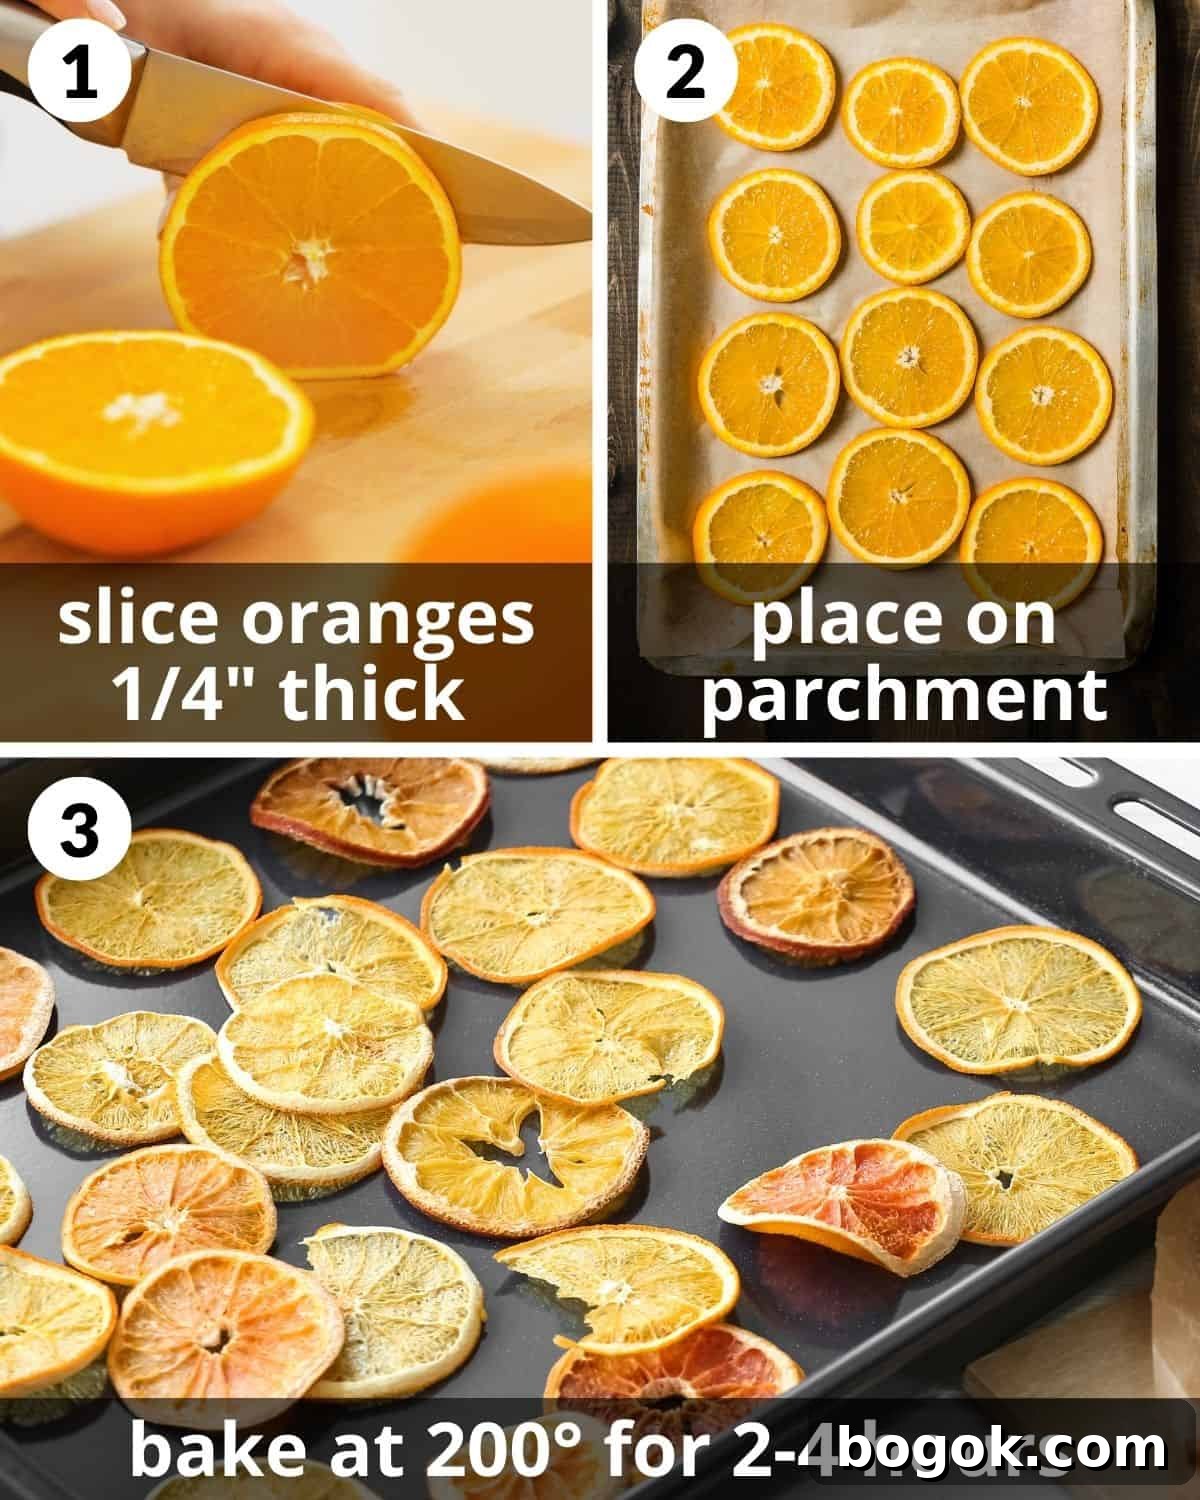
Step 1: Preheat the oven to 200°F (about the lowest setting on many ovens). While it heats, slice the oranges 1/4 inch thick using a sharp knife or mandoline. Pat each slice dry with a paper towel to remove excess moisture.
Step 2: Line one or more baking sheets with parchment paper. Arrange the orange slices in a single layer with space between them so air can circulate.
Step 3: Bake for 2–4 hours, flipping the slices every 30–45 minutes. Keep an eye on color — if the slices begin to brown, the oven temperature is too high. Thinner or drier slices may finish earlier, so remove them in batches as they dry. Let the slices cool completely on the baking sheet.
Remove any slices that finish drying sooner to prevent over-drying or browning.
How To Use Dried Orange Slices
Once dried, orange slices have many uses. Ideas include:
- Add to potpourri or scented sachets.
- Garnish sangria, cocktails, mocktails, or hot teas.
- Use as an edible decoration on cakes, cookies, or loaves.
- Include in marinades or spice blends for added citrus aroma.
- Incorporate into holiday wreaths, garlands, or tree ornaments.
Expert Tips
- Slice evenly: Aim for about 1/4 inch thickness so slices dehydrate uniformly.
- Prevent sticking: Use parchment paper or a wire rack. If neither is available, lightly spray the pan with a neutral oil.
- Flip regularly: Turn slices every 30–45 minutes for even drying and consistent color.
Storage & Shelf Life
Proper storage keeps dried slices usable and attractive.
- Cool slices completely before storing.
- Pack in an airtight container such as a mason jar or resealable bag.
- Store in a cool, dark place away from direct sunlight.
- For culinary use, dried orange slices will keep well for up to two years when stored properly. Decorative pieces may last longer though they can darken over time.
Additions & Variations
- Dehydrator: If you have a dehydrator, slice the fruit thinly and dehydrate at about 135°F for 4–6 hours, checking periodically until the slices are dry.

Recipe FAQs
Slice oranges thinly, pat them dry, arrange in a single layer on a baking sheet, and bake at a low temperature (around 200–250°F) until dehydrated, about 2–4 hours depending on thickness.
Preheat to the lowest setting, slice oranges about 1/4″ thick, place on parchment-lined trays, and bake 2–4 hours, flipping periodically until dry.
You can dry thin slices in the microwave on a low or defrost setting for short intervals, but results vary and they may not dry evenly. Use paper towels and check frequently.
Yes — arrange slices in a single layer and set a low temperature (around 175°F). Drying may take several hours and will depend on air fryer circulation and slice thickness.
Use them as garnishes for drinks and desserts, in potpourri, as baking accents, or as decorative additions to wreaths and gifts.
More Cooking Resources

Cooking Resources
Best Cheeses To Use For Macaroni & Cheese (for Melting & Flavor)

Cooking Resources
8 Crumbly Cheese Substitutes for Feta Cheese (for Pasta & More!)

Summer
Best Toppings for Bratwursts (Condiments & More)

Cooking Resources
The Best Substitutes for Rice Vinegar
If you try this recipe, please leave a star rating in the recipe card below and/or comment — feedback is always appreciated.

How to Dry Orange Slices in the Oven
Equipment
- Baking sheets
- Mandoline or sharp knife
- Parchment paper or wire rack
Ingredients
- 2-4 navel oranges*
Instructions
- Preheat the oven to 200°F. Slice oranges about 1/4 inch thick and pat slices dry.
- Line baking sheets with parchment and arrange slices in a single layer with space between them.
- Bake for 2–4 hours, flipping every 30–45 minutes. Remove any slices that finish earlier. Cool to room temperature on the baking sheet.
Notes
- Oranges: Any variety works; lemons and limes are also suitable and will dehydrate faster.
- Slice thickness: Keep slices about 1/4″ for even drying.
- Prevent sticking: Use parchment or a wire rack; lightly oil the pan if needed.
- Flip regularly: Turn slices every 30–45 minutes for even results.
Nutrition
Nutrition information is approximate.